
The Worker List page lists the Workers of the selected Project. Each row contains a subset of the information of a Worker one special column. The very right hand column contains the Actions dropdown list providing the logged-in user with options to access and modify the Worker's details. User access to the Worker details is determined by the system and the user does not need to be concerned about it.
The Actions dropdown list provides the user with options to access and modify the Worker details and the information associated with it.
The View option is only available in the Actions dropdown list in the very right hand column of the row of a Worker if the project is not editable i.e. if the project status is Active. Selecting this option redirects the user to the relevant View Worker page displaying the Worker detail. See Worker Detail
The Edit option is only available in the Actions dropdown list in the very right hand column of the row of a Worker if the project is editable i.e. if the project status is Draft or Completed. Selecting this option redirects the user to the relevant Edit Worker page displaying the Worker detail allowing the user to change any of the various properties. See Worker Detail
The Delete option is only available in the Actions dropdown list in the very right hand column of the row of a Worker if the project is editable i.e. if the project status is Draft or Completed.
Selecting this option pops up a confirmation window to confirm the intention to delete the selected Worker.

Clicking the OK button removes the Worker from the list.
The Cancel button cancels the action and the Worker not affected.
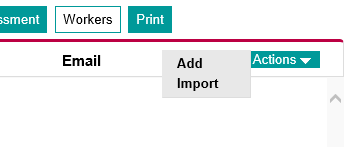
The Add option available in the Actions dropdown list in the header of of the very right hand column of the Worker table if the project is editable i.e. if the project status is Draft or Completed.
Selecting this option redirects the user to the New Worker page allowing the logged-in user to complete and save the detail for the new Worker. See Worker Detail
The logged in user can import the worker data in bulk via Excel or Comma Separated Value files. The format of the files are as follows.
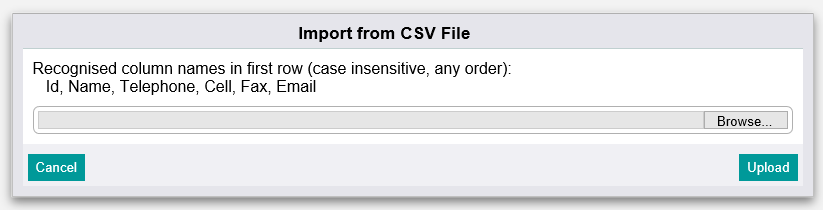
The first row must contain the column names of the data in that column. Recognised column names are Id, Name, Telephone, Cell, Fax and Email. The columns can be any subset of these columns with the only required column the Name column. Columns with names not in the list of recognised column names are simply ignored on import. Columns can be any order and column names are case insensitive.
The subsequent rows must contain the information of the workers correlating to the column names in the first row. Rows will be imported up to the end of file for text files and up to the first empty row for Excel files.
The Import option is available in the Actions dropdown list in the header of of the very right hand column of the Worker table if the project is editable i.e. if the project status is Draft or Completed.
Selecting this option pops up the Import from file window. The logged-in user uploads the file by clicking on the Browse button to the middle, right of the Import from file window, browse for the relevant file and double-click the file or select the file and click the Open button at the bottom right of the browse window. Excel and Comma Separated Value files with either a .CSV or .TXT extension can be uploaded but the logged-in user will be notified if the format of the uploaded file is not recognised.
If the file format is recognised, the records in the file are uploaded and displayed in a table in the Import Worker page.
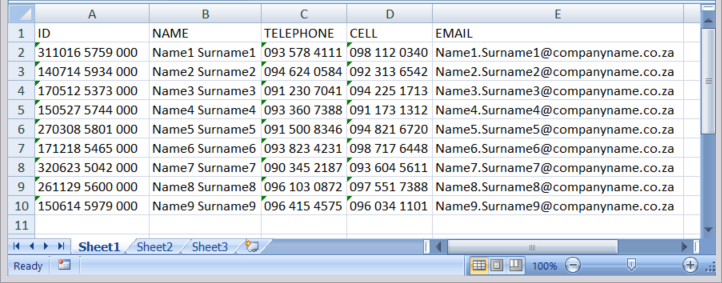
The following are examples of both a typical excel spreadsheet and CSV file containing Worker information. Some values have been left out and the "Telephone" column was misnamed ("Tel") to demonstrate functionality.
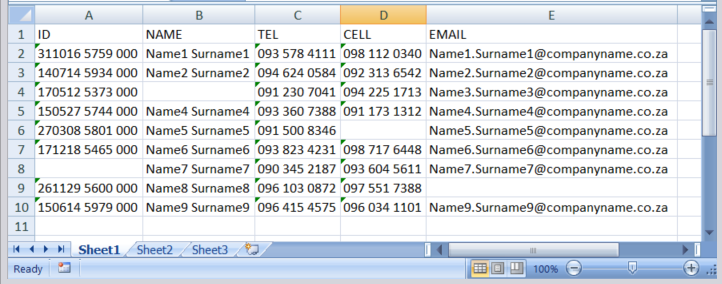 Typical Excel Spreadsheet with Worker Information
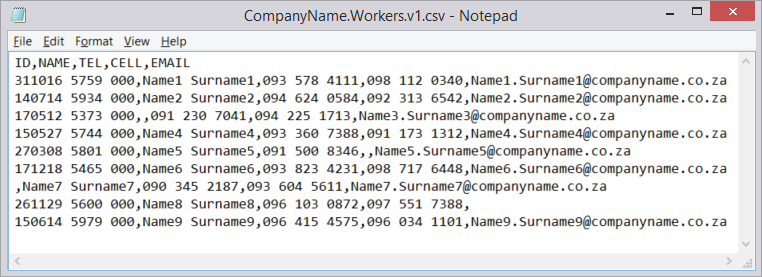 Typical CSV file with Worker Information
On upload, the information is analysed and typically displayed as follows:
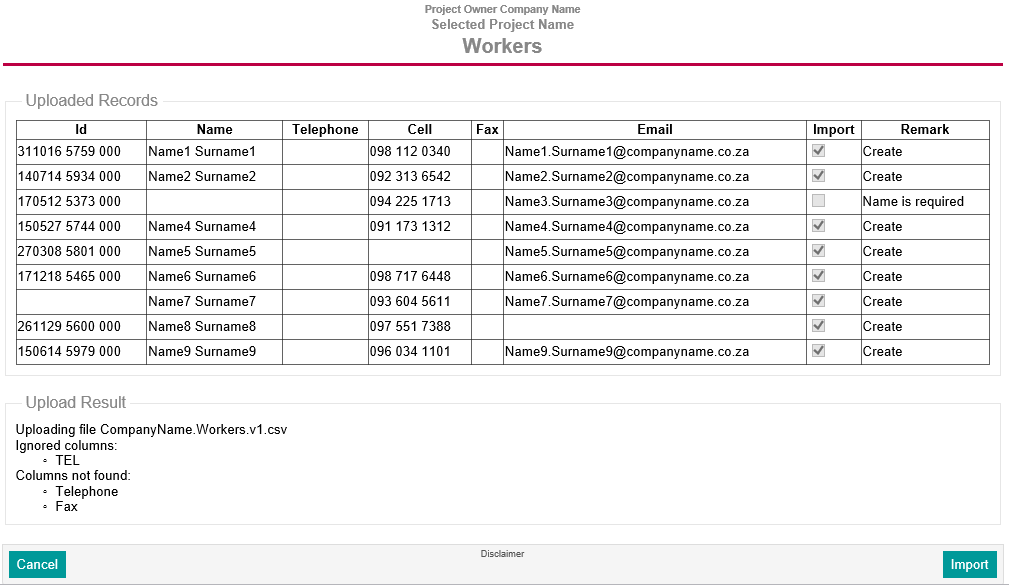
The table labelled "Uploaded Records" displays the tabulated uploaded information. The "Import" column provides checkboxes for selecting or excluding records to be imported with the error free records preselected.
Missing data is handled correctly including the record with the missing "Name" value which cannot imported as the "Name" field is required. The "Upload Result" at the bottom reflects the uploaded file name, columns that were ignored and columns that could not be found.
Clicking the Import button imports the selected records and the Cancel button cancels the import. The logged-in user is returned to the Worker List page with newly uploaded Workers, if any, included in the list.
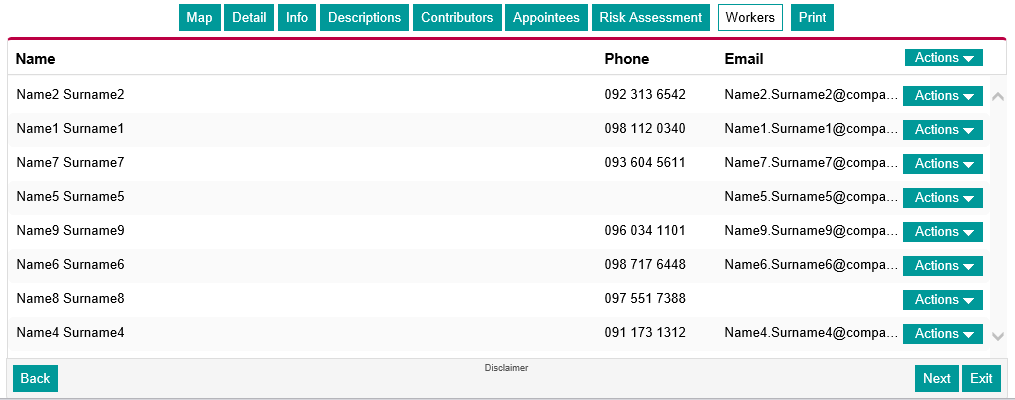 Worker List Page Reflecting Correctly Imported Worker Information
If the user needs to update and/or correct the worker information, the existing file with information can simply be updated. eSafeT will not re-import duplicated records (based on worker name). For the example above, the spreadsheet can be updated as follows:
 Typical Excel Spreadsheet with Worker Information
On upload, the information is analysed and typically displayed as follows:
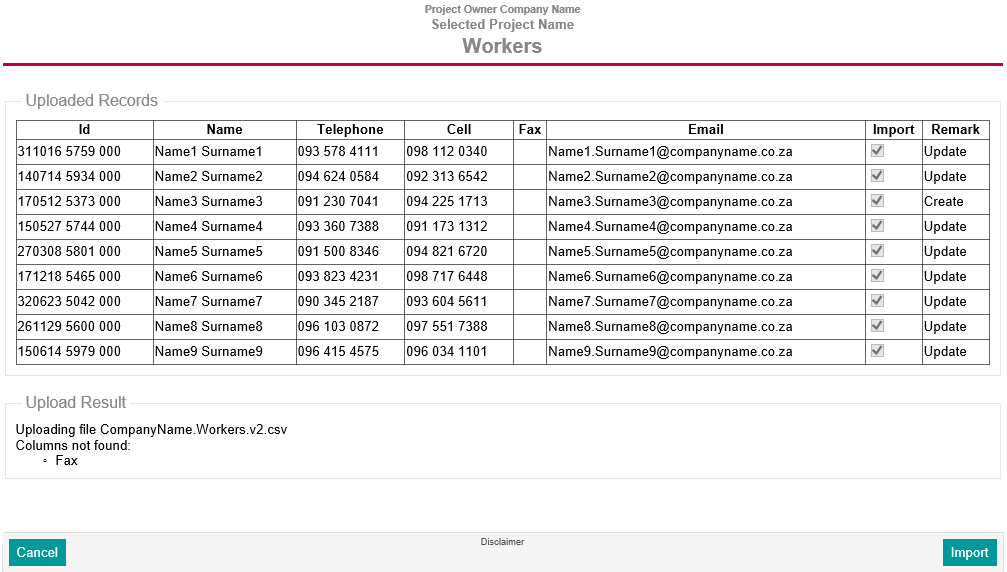
Again, added data and corrected column name is handled correctly as reflected in the Worker List page displaying all 9 Worker records.
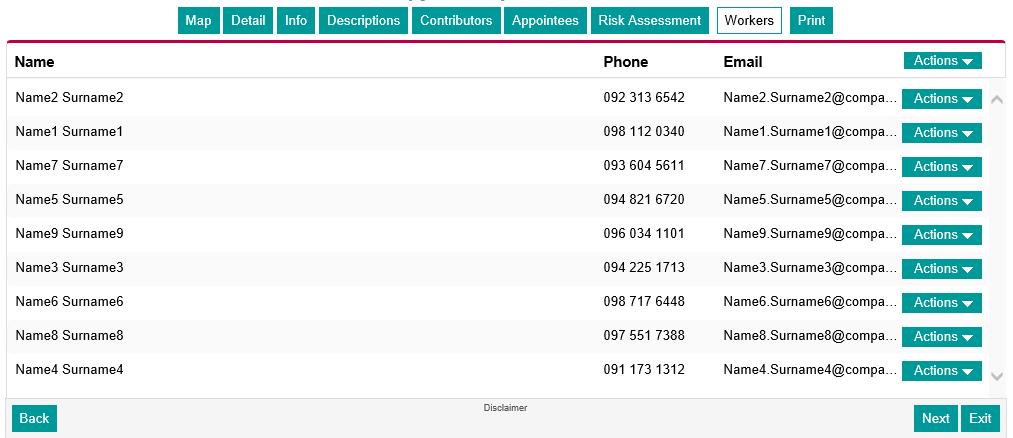 Worker List Page Reflecting Correctly Imported Worker Information